Being a new mom doesn't leave a lot of 'me' time for sewing. I am normally running to the changing table and sitting in the nursing chair for the majority of the time. Yet sometimes the planets align and wonderful things happen- I can sew! I have been working on my new wonder, the Pfaff Passport 3.0, an early Christmas gift from my mom. I absolutely love it. I spent the first 20 minutes of my me time spinning bobbins- the machine does it by itself! In my husband's words: "That's cheating'.
I have done some initial work on my fabric trays. I was originally only making mug rugs, as I am very new to the sewing machine world. I only have had the machine a few weeks. Yet with my mother's instruction and encouragement, I have branched off into tutorials. In addition to the video of fabric trays I showed you, I also like this tutorial that I found on pinterest
seekatesew
I'll be hopefully uploading pictures if nap time holds! What are you working on?
Sunday, December 4, 2016
Monday, October 10, 2016
Fabric trays!
As Jo Anns was having a sale and Fat Quarters were 75% off, I had to pick some up to complement my growing stash of Fat Quarters. I may have gone overboard a little bit

The black is to go with the red that I bought last week and the solid pink is a lining for my drawstring pouches, sun-glass cases and my fabric trays. The Simplicity pattern was 40% off, so I never need to buy pajamas again. I am nearly 6 months postpartum and finding clothes that fit is crazy- one day I fit my pre pregnancy shorts, the next day I look like I'm 4 months pregnant again. I'm going to custom fit my pajamas / lounge pants so that I no longer need to worry about it. The pretty pink plaid is the material for my pajama pants.
Patterns for Pirates also offers an SOS pants that I mean to check out, but I know that leggings are a bit beyond me right now. I only have a straight stitch and not the zigzag that I need for the rayon/ spandex of pegs. If you have a zigzag, be sure to check out Patterns for Pirates Facegroup page- she offers a code in the pinned post comments for FREE leggings (Peglegs) and Pencil skirt. Isn't that nice?
These knits are what I bought for an essential tank from Patterns from Pirates. Only $9 for the pattern and only needs a yard of knit!

I am currently cutting up my Fat Quarters for my Dad's fabric trays. I bought some novelty football fabric for Dad & Mom that I'll pair with orange & black fabric. The idea came to me from this Pinterest post at Clover & Violet
I wanted to see a video before I started sewing, so I found these
This is what I envisioned:
A basket for the kitchen 'Danish bread basket'
This is something new that I have learned today- Fusible Fleece & Interfacing
I had bought fusible fleece and was disappointed to learn that I needed something else- this is for a new project that I am interested in, fabric trays. I am making a few to organize my bathroom, my jewelry and hair things and as always, small notions in my sewing room. It is so appealing to place a few fabric trays on a larger tray and carry it from sewing room to living room so that I can sew and watch the baby play. Have you ever learned fusible fleece?
Sunday, October 2, 2016
I'm so happy to have found clothing that I can sew
I picked up some cheap patterns at Goodwill and was immediately humbled while I laid out those tissues with the patterns. The patterns use terms that I have to look up & check my Youtube videos on. Anyone with a baby knows that you don't have a lot of time when you have two hands to yourself to cut, piece & sew, so a night of research just to get to sewing was not how I wanted to spend my night.
I looked online in my Facebook group, Just Sew, and I found someone posting about Patterns for pirates
Check out the pretty Patterns
It sounded a bit too alternative for me, but I was shocked to find something adorable and 'me' right on the first page. I joined the Facebook group Patterns for Pirates Sewing PDF Pattern Group and was welcomed in with open arms and encouragement about my first sewing for me project. Turns out that they had just the thing- the pinned post shares a code for a free pencil skirt and 'peg legs' leggings! I was shocked and excited. I watched the video on how to sew the peg legs (you know me and my Youtube tutorials! ) and I was thinking 'you know, I can do this'.
Husband pulled out my mom's vacation sewing machine that does straight stitch and I'm going to sit down and practice some straight stitches. While at the Goodwill, I picked up a bag of linens for $2 - some really cute patterns and solids in there. I'll practice making cloth napkins & place mats while I decide on what sort of pattern I'll make first, peg legs or a pencil skirt. I'll be buying fabric - brushed poly- next week, so check back to see what comes up!
Friday, September 30, 2016
Zippered Pouch Tutorial
Hello,
I am working on getting my fabric ironed out for some sachets & pouches. I recently tried to buy zippers for a cosmetics bag pattern that looks promising, but I made a mistake and bought a zipper that is too small. I don't feel like returning it, so I found a great tutorial to use it to learn a new skill, creating a zippered pouch. I love this tutorial- straight forward & clear.
On other projects, I have cut & pinned my sachets & completed my mother in laws Christmas present. I'll be sure to post how I made those as soon as I have time to shoot. Thanks for reading.
Monday, September 26, 2016
Sharing a drawstring bag tutorial
Hello,
I wanted to share with you a tutorial that I have watched several times to learn a new skill for my handmade Christmas. I found this video easy to follow without a lot of irritating effects that distract from the simple sewing.
I attempted to make this bag when the internet was out and forgot the first 2 steps. I am attempting to save this bag- I neatly stitched the top of the bag to make a pouch without a closure. I'll likely add an elastic and a button. Check back as I'll be posting pictures of the finished piece.
This was my first time using water soluble canvas and I truly enjoyed it- it was easy to use and disappeared easily with warm water.


Sunday, September 25, 2016
Sharing a ribbon tutorial
Hello,
Tonight I started to make my first silk ribbon kit that I will offer on my Etsy store for sale. You can find a link to my store over in the links to the left. One thing that I love about SRE (Silk ribbon embroidery) is that it is extremely forgiving. If you make a mistake, you can tease out the ribbon with the eye of the needle or stitch right over the mistake. I have been sewing a Christmas present cross stitch for several weeks and it is finally done! As I'm not adept with cross stitch, I made a few mistakes- I didn't keep the back of the needlework neat and I didn't start in the center of the project. Later as I was completing the cross stitch, I was accidentally pulling stitches through the aida. It took some work to correct and sometimes I had to set it aside and work some Silk ribbon embroidery to relax. SRE looks really pretty in layers and I suggest that you practice layering your ribbon stitches over completed stitches.
The silk ribbon kit that I am working on now has three of my favorite flowers- delphinium, irises and straight stitch flowers. I love how the height of the delphinium and irises complement one another. I had purchased some yellow ribbon that I had not had a chance to use before the birth of my baby, so I am using that with medium blue and white silk ribbon.
Future projects that I am working on is setting up my PVC frame to stitch a larger embroidery for a pillow sampler. As this Youtube poster is showing a group of flowers, I'll be making a small group of flowers to sew into a pillow for a Christmas gift. I am very excited!
Wednesday, September 14, 2016
Felt Ornaments
One thing that I am very interested in is felt ornaments. They are a fun way to finish a cross stitched piece. Last year I bought the book 'the big book of Christmas quickies' and I have been slowly working my way through it for inspiration and gift giving ideas. If you are looking for some inspiration, I highly suggest looking it up. It suggests many ornaments, table trees and mason jar ideas. I had no idea that table trees existed, but its an interesting thought. The mouse ornaments and the reindeer feed bag that I posted earlier are both from the Christmas quickies cross stitch book.
Now as I have never made a felt ornament where you cut a circular ornament to show off cross stitch, I looked up a few tutorials. This is one that I like from Pinterest, a great place
https://www.pinterest.com/pin/44332377557901150/
Thursday, September 8, 2016
Ornament tutorials
Whenever I am unsure of how to do something, I like to look up tutorials. I have found some great resources at the local library for cross stitch & silk ribbon embroidery books, yet many are vague on finishing. As I am not very experienced in sewing and have greater experience in silk ribbon embroidery with very easy finishing methods, I started researching different ways to finish my Christmas gifts. The big book of Christmas quickies published by Leisure arts that I have used to sew a gift for my mother in law suggested tracing a provided pattern and using paper backed fusible web, fuse the web to the wrong side of the piece. If you are using the Christmas book of quickies, you can find all directions under fabric backed ornaments on page 144.
Circular Tutorial from Pinwheel Ponders
I like that this uses material that I'm familiar with- quilt batting, cardboard and easily found sewing materials. This may be easier than learning how to use fusible web as I've never used fusible web before. I'll be trying this out after I finish my mother in laws ornament- check back for some pictures and feedback.
Thursday, September 1, 2016
Why I'm doing a home made Christmas this year
Hello, thanks for coming by. As I just got a major boost in my holiday gift shopping, I wanted to share why I'm doing a handmade Christmas this year. I found out that my mother - in - law used to have a homemade Christmas in her youth and loves homemade ornaments. My parents and I once had a homemade Christmas when I was younger and I really enjoyed learning a new skill and contributing. As a child, we spend money given by our parents and we don't really feel like we've contributed.

Some reasons why I want to have a home made Christmas are :
1. Appreciation of my loved ones
I love giving things that feed into my loved ones' hobbies or joys or fill a void that they have. Now my parents tend to buy whatever they need, so I search out 'wants'- like things to help them quilt or garden.
2. Finances
As a new stay at home mom, the transition from a 40 hour work week to homemaker has been quite the adjustment. One adjustment is that our Christmas budget has become a topic to talk about. We follow Dave Ramsay's financial advice and want to have a solid 6 months of expenses saved in our account and money set aside every month for both of our retirements. While we're set to reach our goal just after Christmas if we keep up our saving, spending even $50 on each family member will set us back for months.
3. I hate materialism
I specifically don't like searching for a gift that my family will enjoy. I remember one time that I bought a wine aerator simply because I couldn't think of a good, useful gift. It wasn't my best gift giving moment!
My feelings were affirmed when I read about another mother who seems just as thrifty as I am. I found this at her blog, which I encourage you to check out
Sixfiguresunder
Homemade doesn't mean 'cheap'. I am buying high quality fabrics and materials to create gifts that will last, be useful and appreciated. I also enjoy learning new skills, like learning how to sew a zipper for a makeup pouch and learning how to continental stitch to make an eyeglass case. These are some ideas that I'm floating for Christmas. Christmas is nearing and my crafting time is narrowing!


Hand Sewing Project: Pouch
Hello,
Anyone who knows me knows that I love and respect hand sewing. All of my projects have been hand sewn because I love the relaxation of sewing and the pride that I feel when I hear someone say 'Wow, that's hand sewn?' because I love seeing that I've stitched a nice
Wednesday, August 31, 2016
Musing about offering silk ribbon projects
Hello,
Thanks for stopping by. I am thinking about offering my own silk ribbon embroidery projects. I have been spending some time surveying Etsy while spending hours breastfeeding and it strikes me how expensive many of the kits offered on Etsy are. Now I know one person hand dyes her crafts which understandably adds cost and time on her part. However if you work out how much silk ribbon costs per yard for those offering pre - manufactured ribbon like Bucilla, the cost seems prohibitive.
I have been collecting silk ribbon through sales & as gifts for many years and have quite the stash (although I never seem to have enough 7 mm pink and forest green!) and I wonder if I can offer an affordable kit, only charging for materials and time for creating the kit. The one thing that gives me pause is the instructions- I work much better through Youtube videos than describing the lay of the ribbon on paper. I believe that I will begin an attempt by sharing one project that I plan to draft tomorrow during my 'me' time. Perhaps you'd like to sew along with me? Check back during the week to see the project!
Tuesday, August 30, 2016
Crafty mommy
Hello,
I hope that this finds you well. I have been very busy as many changes have happened in my family. Due to some child care conflicts, I decided to stay home and become full time mommy to our little lovebug. I thought that this meant lots of free time! Boy, was I wrong. Babies need snuggles and enrichment time...


My little one loves his twenty minute naps. He hates to close his eyes for fear of missing anything. I have set up a laptop in the nursery and when he settles down in his swing to sleep, I promote my shop on Twitter and sew my silk ribbon embroidery.

I'm hoping to do a homemade Christmas this year.
I have reached into my stash for my vintage iron on patterns and modern silk ribbon embroidery books. I am searching for useful patterns to make for my family - a sewing bag, a sunglasses case and sachets. I love making sachets - they are so fun to free embroider. Here are two of my own patterns


Due to my time constraints, I started to use iron on patterns. I haven't fallen in love with them- I don't like being locked into specific stitches. I also have a problem with a silk ribbon embroidery on a picture frame- an iron on pattern on Black Bucilla moire fabric. Try to iron on a pattern on Black fabric. The best I can decide is to order special quilting pencils in pink or yellow and hold the pattern to a light box. Its going to be a trial.
So far I have finished three silk ribbon embroidery stitching - two hearts and one horse shoe with floral pattern for a sachet. I want to attempt to make small pillows for the hearts. I also pulled out my old cross stitch book from three years ago when I found out that my mother in law loves handmade ornaments. Now I'm stitching a little mouse!

Thanks for stopping by. Hope to see you back to see the pictures of my Christmas gifts!
I hope that this finds you well. I have been very busy as many changes have happened in my family. Due to some child care conflicts, I decided to stay home and become full time mommy to our little lovebug. I thought that this meant lots of free time! Boy, was I wrong. Babies need snuggles and enrichment time...

Our little one grew so strong. He's now my little inch worm, rocking his bottom when he sits in my lap to tell me to help him to sit and to stand.

We're still not sure about this 'food' stuff.

My little one loves his twenty minute naps. He hates to close his eyes for fear of missing anything. I have set up a laptop in the nursery and when he settles down in his swing to sleep, I promote my shop on Twitter and sew my silk ribbon embroidery.

I'm hoping to do a homemade Christmas this year.
I have reached into my stash for my vintage iron on patterns and modern silk ribbon embroidery books. I am searching for useful patterns to make for my family - a sewing bag, a sunglasses case and sachets. I love making sachets - they are so fun to free embroider. Here are two of my own patterns

Due to my time constraints, I started to use iron on patterns. I haven't fallen in love with them- I don't like being locked into specific stitches. I also have a problem with a silk ribbon embroidery on a picture frame- an iron on pattern on Black Bucilla moire fabric. Try to iron on a pattern on Black fabric. The best I can decide is to order special quilting pencils in pink or yellow and hold the pattern to a light box. Its going to be a trial.
So far I have finished three silk ribbon embroidery stitching - two hearts and one horse shoe with floral pattern for a sachet. I want to attempt to make small pillows for the hearts. I also pulled out my old cross stitch book from three years ago when I found out that my mother in law loves handmade ornaments. Now I'm stitching a little mouse!
Thanks for stopping by. Hope to see you back to see the pictures of my Christmas gifts!
Friday, July 1, 2016
My scrapbook: the first pages
Hello, thank you for coming by.
I went to the Project Life kit for the pages that will start the scrapbook. At the time I only had 6 photos so the pages have blanks. I plan on filling in with pictures of family and gifts that family and friends who couldn't be present for the birth sent to Jason. The tags all color coordinate with one another so it was hard to choose the best ones. I went with one that had lines for journaling, a heart for the baby and a camera art that I liked.

The week before last, I worked on cutting photo mats and laying out some Christmas pages. As it will be baby's first Christmas, I'm betting that I won't have a lot of time to craft. By knowing what sizes and orientation that I laid the photo mats in the scrapbook, I hope to remember to capture photos that will fit the pages. You may remember that I said that I'm scrapping on a budget- I am using some Christmas scrapbook supplies, 12 x 12 Espresso and 12 x 12 Real Red that Stampin'up! sent out for free one Christmas. Thanks, SU!
Christmas 1, 2 & 3


These are standard 4 x 6 photo mats and designer series paper. This would be very easy to create with current stampin' up! designer series paper. You may be asking yourself what is that black washi tape- that is to pin the elements in place while I design. It peels off of the paper without leaving a residue or harming the paper, so you can rearrange to your hearts content. I will not adhere the mats down until I assemble them to the photos. If I change my mind, I can use the mats for another page. Make use of what you have and waste nothing is my motto.
You can see that those were very basic drop photo in here pages. For Jason's pages I have been having a little fun. In this page I include two photos of Jason's Grandmothers, retired Lullaby paper and a current journal tag from Project life. I use the Made with Love stamp set to add two kitty stamps and I use the single heart to make a background in Hello Honey and Coastal Cabana.


Made with Love is a great set to play with for a scrapbook with those background stamps & sayings. I might start watercoloring on the pages.


The next page uses a full 12 x 12 page of Lullaby designer series paper. I went with simplicity by matting the photos on whisper white, coastal cabana and tempting turquoise. Jason's first bath was photographed to send a thank you pic to the loved ones who sent the swaddler, winnie the pooh towel and bluebird lovey. I plan on the opposite page to have a journaling tag mentioning Darcy, Grandma and Samantha's gifts underneath a larger 5 x 7 photo. I think that I'll use the same color and shape banners that were on the Grandma & Nana page to keep a cohesive look to the scrapbook.
I am currently working on matching the layout of Papa & Nana Kat to be a 2 page spread with the Grandma Kitty & Nana Genie page. Little boy is very lucky to have five grandparents who love him and I was lucky to get a pic of him with 4 grandparents. Somehow my photographer mother is only in one picture. To rectify that, I had my husband snap a few photos of Nana Kat holding Jason when she did a 2 month photo shoot of Jason.
I am very excited to see these 2 month photos! Most of these pics were candid shots and I can't wait to see a few different poses in the same outfit. It makes me excited to imagine those scrapbook pages. Thanks for coming by - I plan on making a how to of the more elaborate Nana & Papa page that I am making. Let me know your thoughts!
I went to the Project Life kit for the pages that will start the scrapbook. At the time I only had 6 photos so the pages have blanks. I plan on filling in with pictures of family and gifts that family and friends who couldn't be present for the birth sent to Jason. The tags all color coordinate with one another so it was hard to choose the best ones. I went with one that had lines for journaling, a heart for the baby and a camera art that I liked.

The opposite page is a matching Project Life page with horizontal pictures. I will be sure to photograph once it is completed! I am very excited to pull out the journaling tags as it makes chronicling memories so easy. That is a big factor for me as I normally do this when the baby is watching from his bouncy seat and Jason only stays there for 20 minutes. Ease of coordination and time saving organization is a big plus for Project Life right now.
Christmas 1, 2 & 3


These are standard 4 x 6 photo mats and designer series paper. This would be very easy to create with current stampin' up! designer series paper. You may be asking yourself what is that black washi tape- that is to pin the elements in place while I design. It peels off of the paper without leaving a residue or harming the paper, so you can rearrange to your hearts content. I will not adhere the mats down until I assemble them to the photos. If I change my mind, I can use the mats for another page. Make use of what you have and waste nothing is my motto.
You can see that those were very basic drop photo in here pages. For Jason's pages I have been having a little fun. In this page I include two photos of Jason's Grandmothers, retired Lullaby paper and a current journal tag from Project life. I use the Made with Love stamp set to add two kitty stamps and I use the single heart to make a background in Hello Honey and Coastal Cabana.
Grandma & Nana


Made with Love is a great set to play with for a scrapbook with those background stamps & sayings. I might start watercoloring on the pages.


The next page uses a full 12 x 12 page of Lullaby designer series paper. I went with simplicity by matting the photos on whisper white, coastal cabana and tempting turquoise. Jason's first bath was photographed to send a thank you pic to the loved ones who sent the swaddler, winnie the pooh towel and bluebird lovey. I plan on the opposite page to have a journaling tag mentioning Darcy, Grandma and Samantha's gifts underneath a larger 5 x 7 photo. I think that I'll use the same color and shape banners that were on the Grandma & Nana page to keep a cohesive look to the scrapbook.
I am currently working on matching the layout of Papa & Nana Kat to be a 2 page spread with the Grandma Kitty & Nana Genie page. Little boy is very lucky to have five grandparents who love him and I was lucky to get a pic of him with 4 grandparents. Somehow my photographer mother is only in one picture. To rectify that, I had my husband snap a few photos of Nana Kat holding Jason when she did a 2 month photo shoot of Jason.
I am very excited to see these 2 month photos! Most of these pics were candid shots and I can't wait to see a few different poses in the same outfit. It makes me excited to imagine those scrapbook pages. Thanks for coming by - I plan on making a how to of the more elaborate Nana & Papa page that I am making. Let me know your thoughts!
Fast fuse- great for scrapbooking
I had to remind myself how to use fast fuse while scrapping the the other night and I thought that I would share the proper way to use Fast fuse
I hope that you enjoy fast fuse with your scrapbooking! If you need a refil, you still have one more month to order from me.
Wednesday, June 29, 2016
Scrapbook plans
The baby has decided that he only wants to nap 20 minutes at a time, so getting snapshots of the scrapbook layouts when I'm home alone with him hasn't been working. It is the husband's weekend so I hope to get some snapshots of the hybrid scrapbook that I am making.
Hybrid because half of the items are Project Life which has the neat little divided pockets that I will fill with the journal cards and half will be traditional 12 x 12 pages. Now I've never had much luck on scrapbooks- I tend to give up. so far I've been using washi tape to lay out possible layouts- its hard without having photos to use. Sadly I don't have many pictures of family.
Here are 2 of the samples of the project life 12 x 12 that has inspired me

I have downloaded some layout samples from Pinterest- one of the biggest compliments that I received as a Stampin' up! demo was how creative I am. Yet most of my projects were CASEd from Stampin up! samples. I am trying to use the layouts as a jumping off point. I am sticking to clean and simple layouts like the one below.
I challenged myself to only order three items from Stampin' up! for my scrapbook. I already possess one set of 12 x 12 Project Life pages, one set of 12 x 12 whisper white sheets, one set of 12 x 12 subtles sheets, the baby boy project life kit and various designer paper from 3 years of demonstratorship. I chose to buy a pack of 12 x 12 page protectors, a pack of whisper white paper and Subtles Designer series paper stack. That came to $46.00 yet due to my discount as a demo, I paid $36 (you can sign up under me to earn two free stamp sets in your starter kit for one more day!)
I ordered some prints of Jason's birth and the visit from my sister/ brother in law & niece the month after Jason's birth as the focus point of the first pages. I ordered mostly 5x6 but also a few 4x4s to try a row of three smaller pictures alongside a larger picture. I hope to get that scrapped tomorrow- keep an eye here for pictures!
If you are interested in buying any stampin' up you can do so for one more month here
Happy stamping!
Friday, June 24, 2016
My scrapbook is coming together
Hello,
I have been working on my scrapbook twenty minutes at a time while the baby naps. So far, I have come up with a few cute baby pages! My husband has set up my photo box so I will do my best to get some photos taken during nap time later today. I am making a hybrid album- some stampin' up! project life pages and some that I am creating on 12 x 12 paper. While searching for inspiration, I find that the quick day to day aspect of Project life appealed to me. Here is the video that I am watching to pick up more tips. As I stamp today I will snap some pictures to share my thoughts with you
I have been working on my scrapbook twenty minutes at a time while the baby naps. So far, I have come up with a few cute baby pages! My husband has set up my photo box so I will do my best to get some photos taken during nap time later today. I am making a hybrid album- some stampin' up! project life pages and some that I am creating on 12 x 12 paper. While searching for inspiration, I find that the quick day to day aspect of Project life appealed to me. Here is the video that I am watching to pick up more tips. As I stamp today I will snap some pictures to share my thoughts with you
Monday, June 20, 2016
Clearance Rack
Hello!
Thanks for swinging by. I wanted to show you a section of Stampin' Up! that you might not be aware of- the Clearance Rack. Here you can get great deals on Stampin' Up! products. Take up to 60% of these select products. You have to get them now as they are first come, first serve. You can shop here To get a peek at the new Catalog, look at the publications tab for the PDF. I want nearly everything in the catalog so good luck choosing your wish list!


Carolyn King has created the cards up above with the new color stack that I love- Playful Palette. You can see the new colors including my favorite, the deep green Emerald. Great for guy cards! This set also has paint splatter and black and white designs. I'll get you a peek at my cards asap!
Thanks for swinging by. I wanted to show you a section of Stampin' Up! that you might not be aware of- the Clearance Rack. Here you can get great deals on Stampin' Up! products. Take up to 60% of these select products. You have to get them now as they are first come, first serve. You can shop here To get a peek at the new Catalog, look at the publications tab for the PDF. I want nearly everything in the catalog so good luck choosing your wish list!

Shop now


Carolyn King has created the cards up above with the new color stack that I love- Playful Palette. You can see the new colors including my favorite, the deep green Emerald. Great for guy cards! This set also has paint splatter and black and white designs. I'll get you a peek at my cards asap!
Sunday, June 19, 2016
Saturday, June 18, 2016
Joining Stampin' Up! this month = 2 free stamp sets

That’s right! Every new demonstrator who joins this month will get two FREE stamp sets in their Starter Kit. That’s an added value of up to $104 USD/$136 CAD, depending on which stamps your new recruit chooses. It’s a pretty big deal since that’s the same month we launch the new catalog and the new stamps inside it. Plus, anyone hosting an event with you in June can also get Extra Stampin’ Rewards, which can be used towards their Starter Kit.
- Promotion Period: June 1–30, 2016
- New recruits who join during the promotion period may choose two stamp sets from the new annual catalog to be included in the Starter Kit for free.
- Bundles and kits cannot be selected as free stamp sets for this promotion.
- Promotion Deadlines: New recruits must be submitted online or by fax by the times below in order to receive free stamps.
- FAX: Thursday, June 30, 2016 by 6:50 PM (MT).
- ONLINE IDA: Thursday, June 30, 2016 by 11:50 PM (MT).
- You can join the fun here!
Monday, June 13, 2016
Here is a peek of what is in my shop. As a new stay at home mother, I will likely let my stampin' up!
account lapse until I have enough free time to host parties again. I don't think that I'll make enough
sales this month to stay active. You can make your stampin' up and scrapbooking purchases through me through July, however!
Sunday, June 12, 2016
Scrapbooking bug
Hello!
I have recently been bit by the scrap booking bug. My mom has visited me from out of state with a
collection of snapshots from Jason's birth that I had never seen before. Now while I have a Project
life set just for Jason's birth, I wanted to include some pages in my 12 x 12 scrapbook. I have been
keeping this scrapbook for eight years.
My little one would be the perfect jumping off point for a new scrapbook

This is definitely a picture that I want included. This yellow blanket is a family heirloom on my husband's side. It was a big moment for our baby to be brought home swaddled in it.

I have been scouring the internet for ideas and have settled on this layout

with these stamp sets as a jumping off point. I don't have much of that designer series paper so I will be dying my own Irresistibly yours paper. I'm definitely doing that with mom here to help- I'm sure every mom remembers how a little one seems to need you every 20 minutes :)

When you design your scrap book layouts do you use one color scheme for the whole layout- or use one color scheme per two page spread and change colors through out the album? I have read some scrapbook guides that suggest matching colors of paper and embellishments to what colors are represented in the photographs. Let me know your style!
Tuesday, June 7, 2016
A new technique- Masking
Masking
How to mask using post it notes
Made easier using the Big Shot! and framelets

One great effect is overlaying floral images like in the happy blooming birthday card above used with one of my favorite stamp sets, Flower Patch. I made the masking effect a little more obvious by leaving an un - inked barrier between flowers but you could make a seamless mask for an impressive effect. All you need is a stamp set, ink pad, post it notes and scissors.
1. Stamp your base (the larger pink flower and the two leaves above it)
2. Stamp the pink flower on a post it note. Cut around the flower closely.
3. Place the post - it cut out over the pink flower
4. Stamp the blue flower right over the post it note. Adjust the post it note to ensure that the other side is still covered. Stamp as many times as you like as long as you are covering the flower with the post it.
For a faster time, cut the post it with the Flower Fair Framelets & the Big Shot!
To make the above card you need Flower Patch & Banners Framelets Dies
The new catalog has many floral options. Check back to see what I do with my pre- order, Fabulous Flora

Basket for you

Monday, June 6, 2016
Flower Shop Thank - You cards
Hello!
I hope that this finds you well. I have been enjoying being the mommy of a newborn so much! I have been blessed to be able to stay home with my little one and I had some time to make some thank you cards. Here are some of the thank you cards that I had the most fun stamping


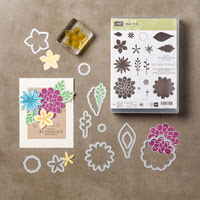


This card was created with the Flower Patch stamp set which is Photopolymer. I enjoy polymer because we can bend the images and layer the images easily.

Stampin' Up has created this card:

If you are wondering how those flowers were die cut so perfectly, you can do so yourself with the Bundle- click for more info or to purchase
Subscribe to:
Posts (Atom)